This feature is only available on Dub Enterprise.
For Dub Enterprise users, you can automatically provision and deprovision users from your Azure Active Directory (AD) to Dub using SCIM Directory Sync.
Prerequisites
Before you can configure SCIM Directory Sync, you need to create a SAML application in Azure. See Configuring SAML SSO with Azure Active Directory for more information.
Step 1: Configure Directory Sync on Dub
In your workspace dashboard on Dub, click on the Settings tab in the menu bar at the top. Then, click on the Security tab in the sidebar.
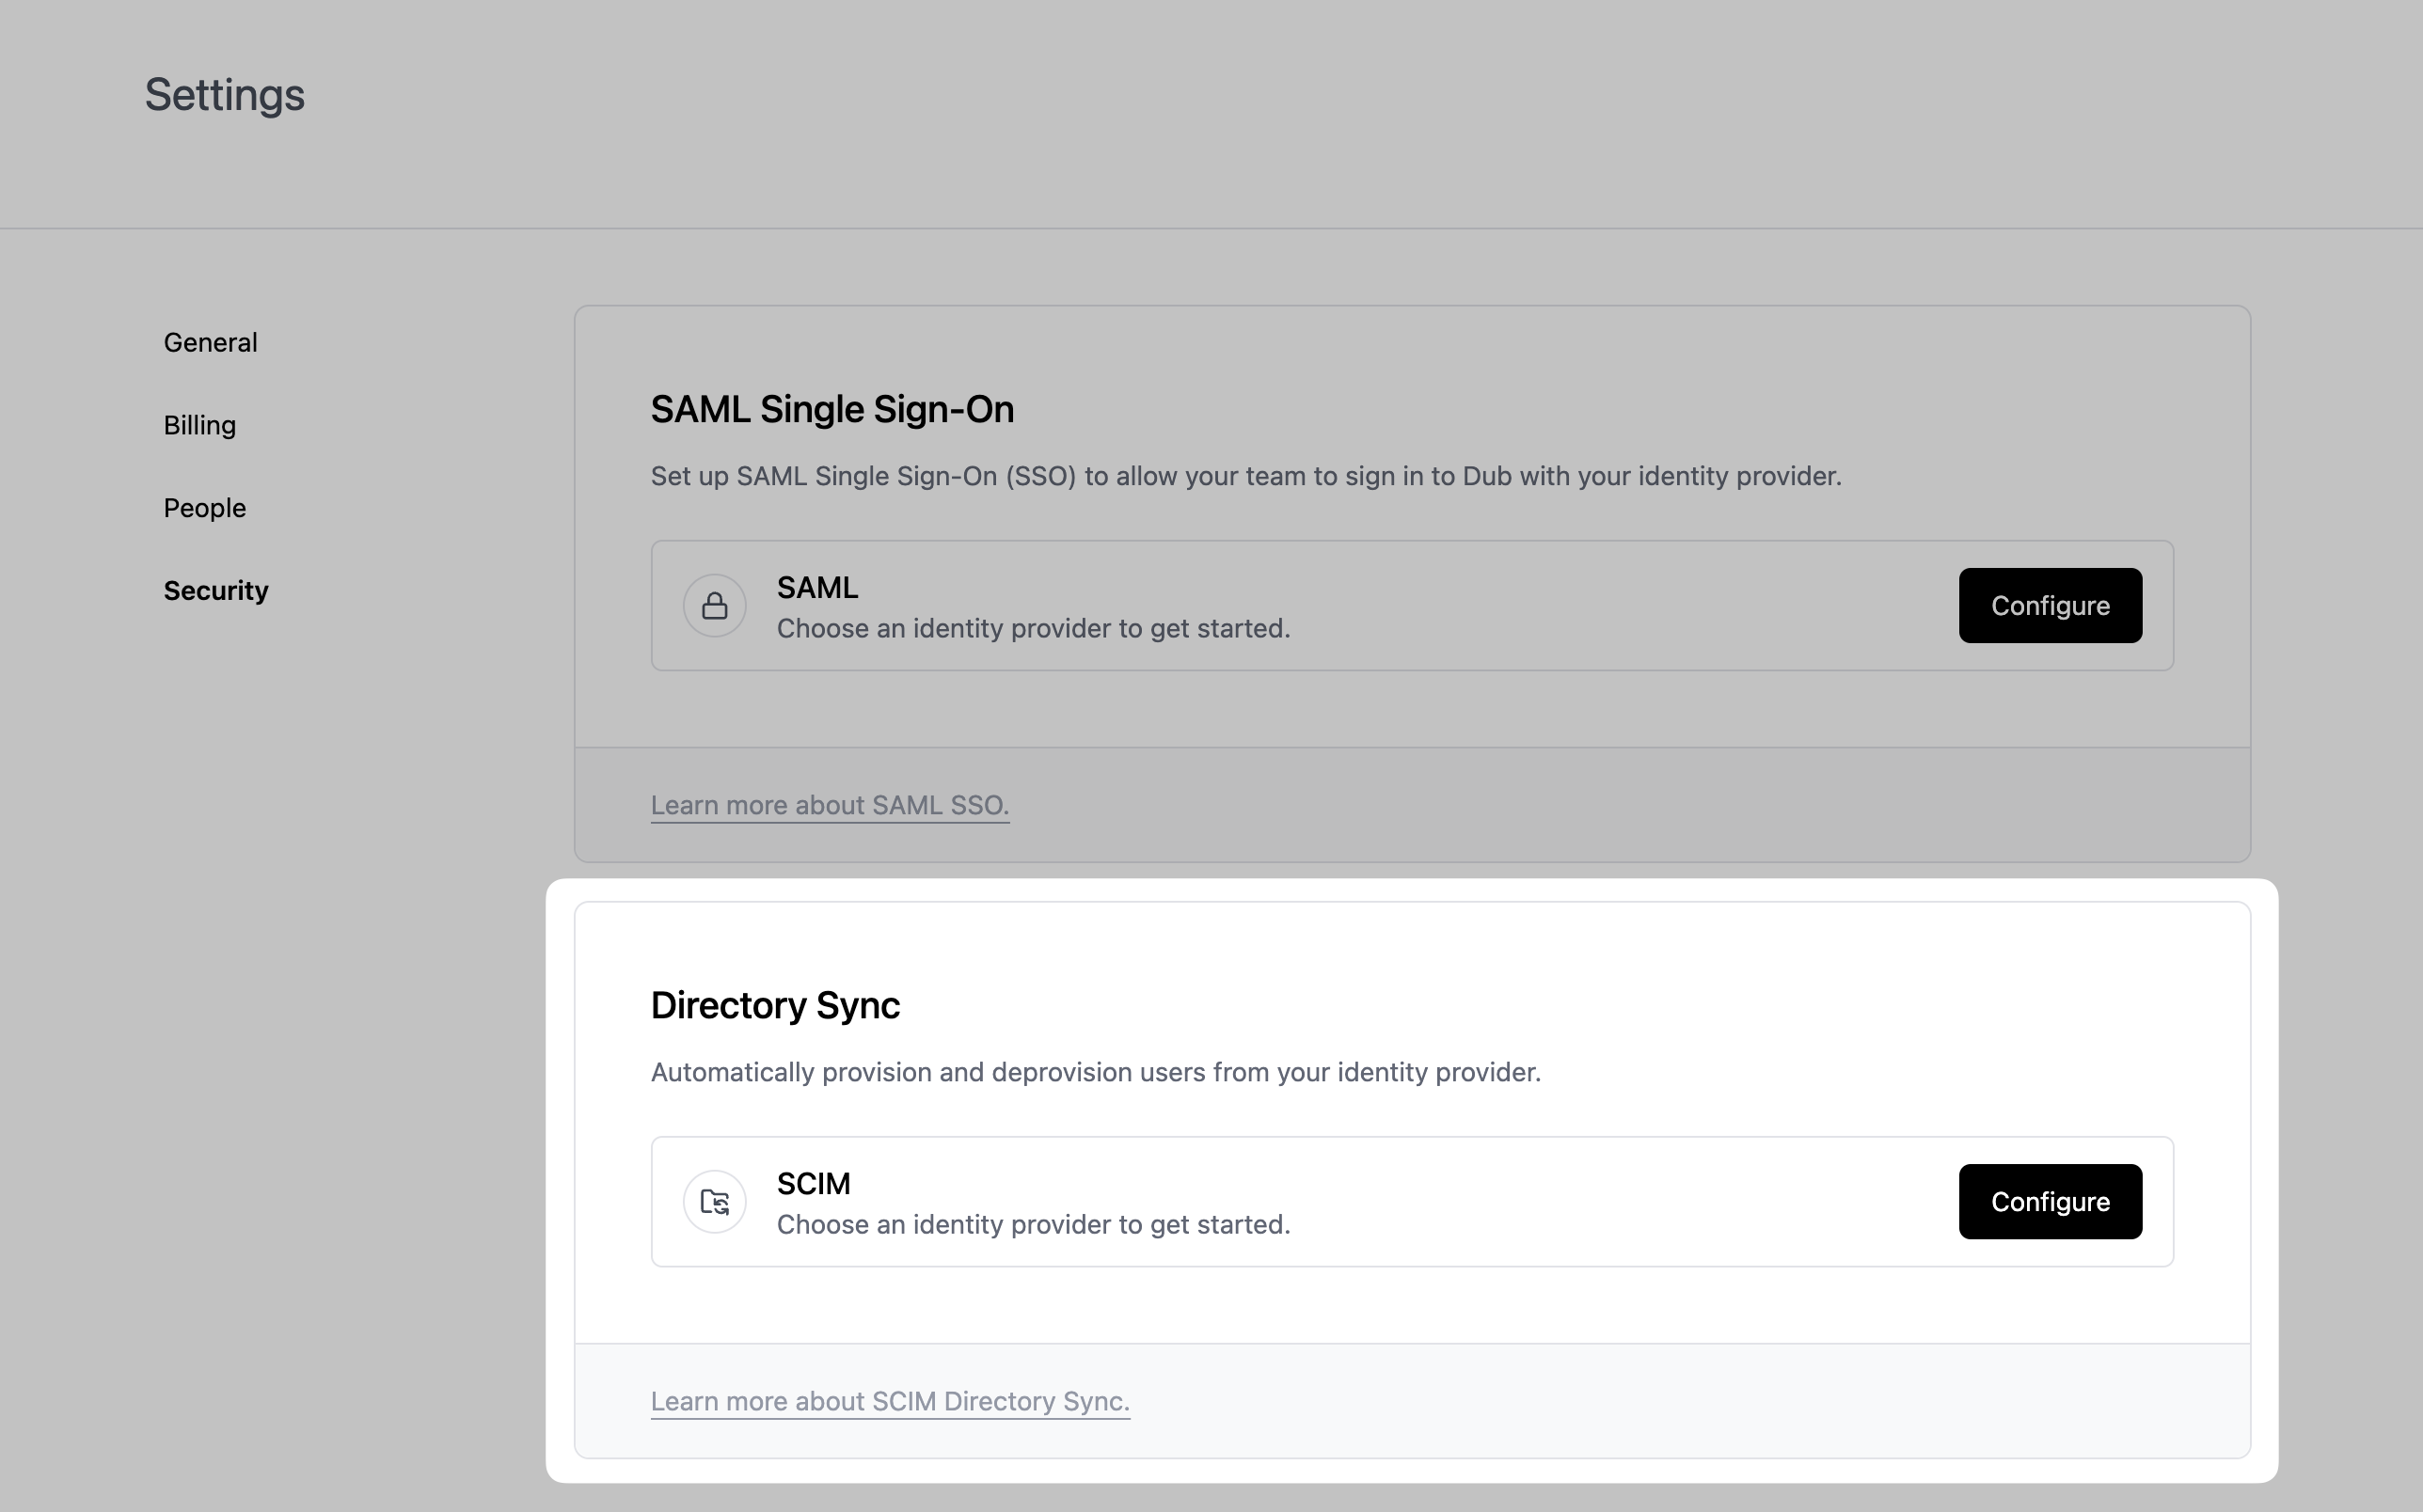
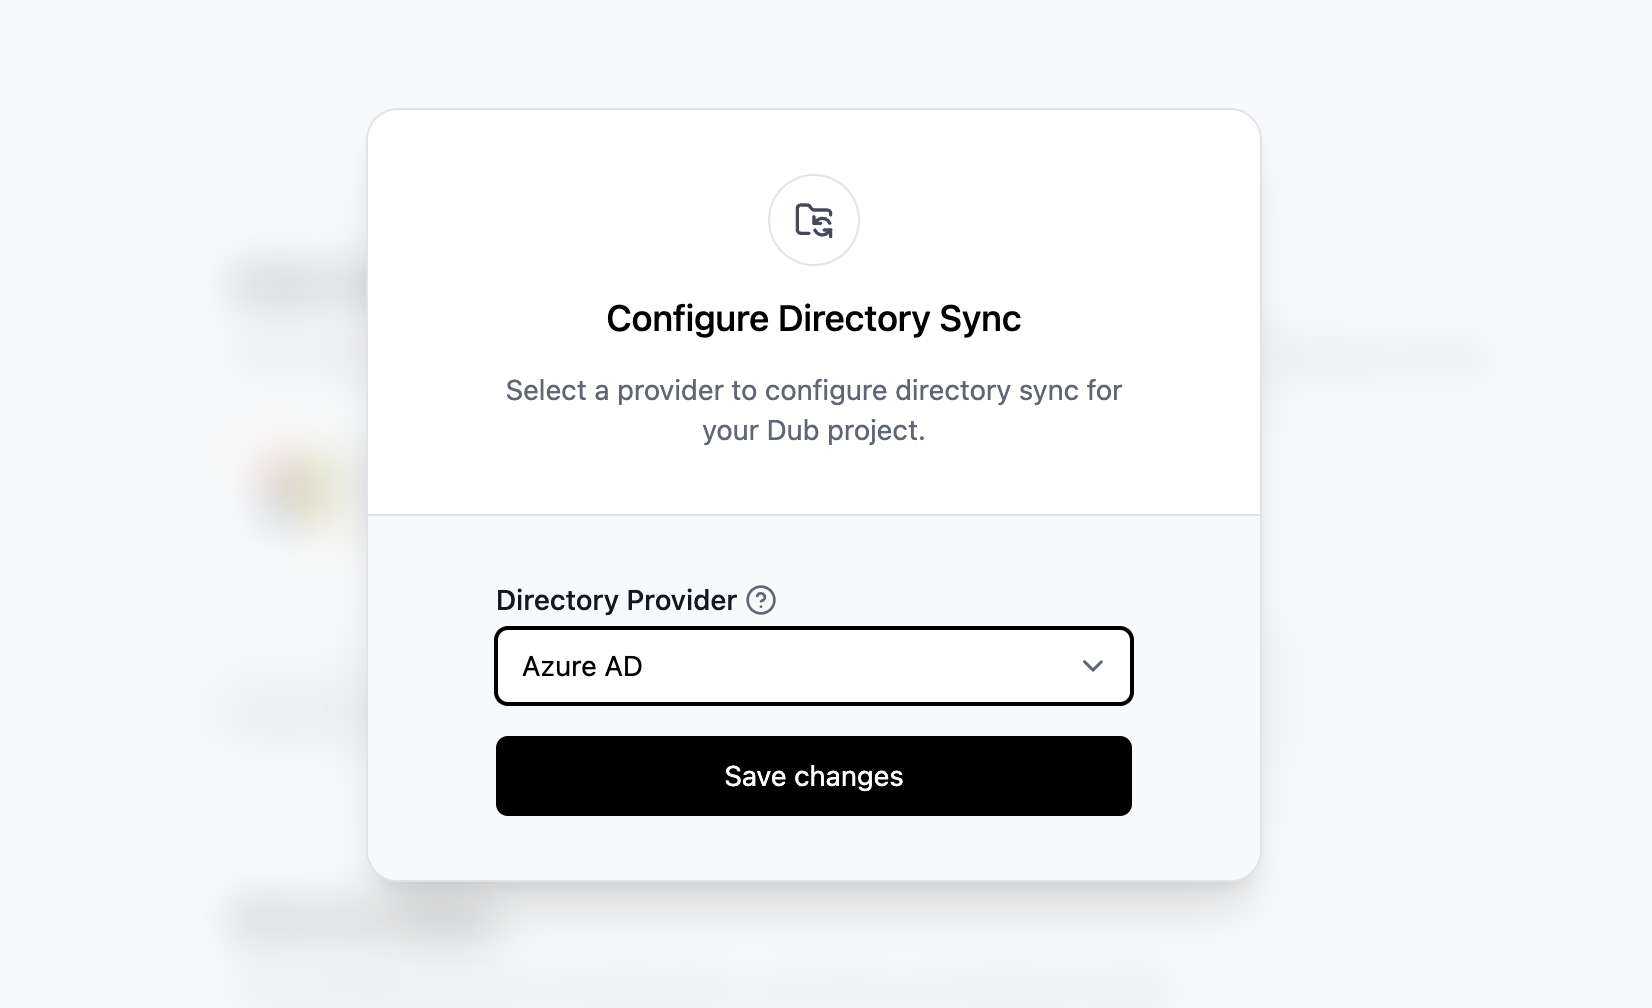
Under the Directory Sync section, click on Configure. This will open up the Directory Sync modal:
- Select Azure AD as the Directory Provider.
- Click Save changes.
This will generate a Directory Sync connection for your Dub workspace, and return 2 values, which will be needed in Step 2:
- Tenant URL
- Secret Token

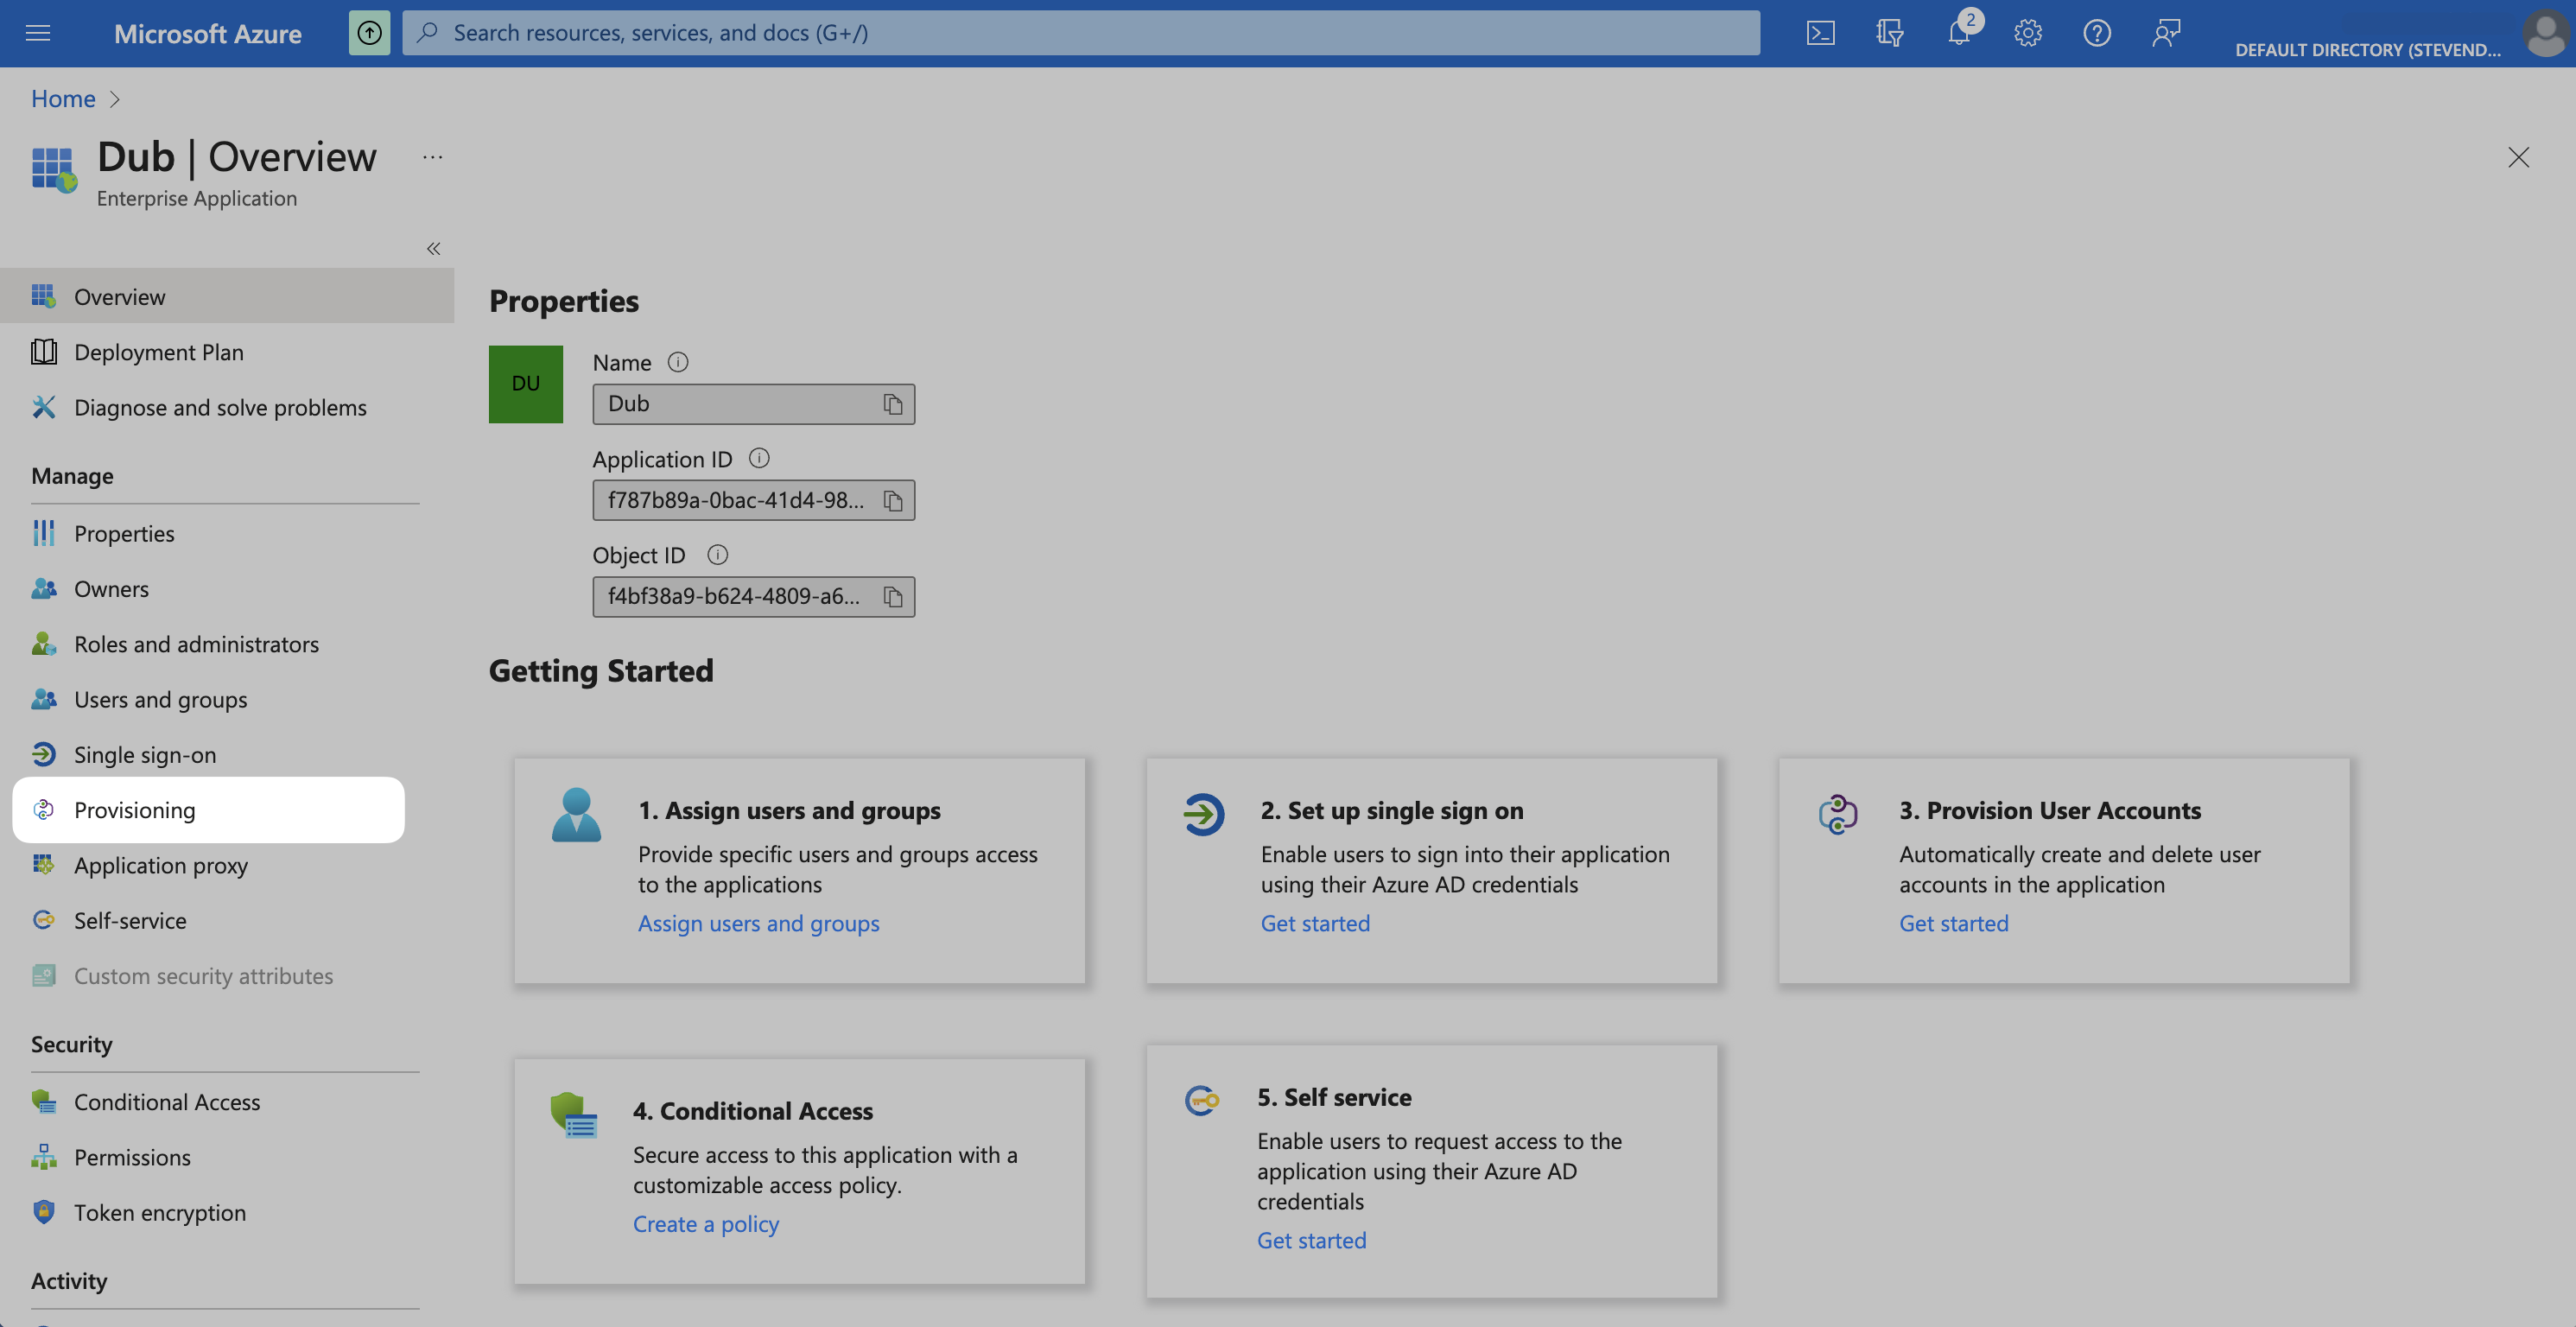
Step 2: Add Provisioning to SAML Application
Click on the Provisioning tab of your existing Dub Okta SAML application that you want to enable SCIM provisioning for.
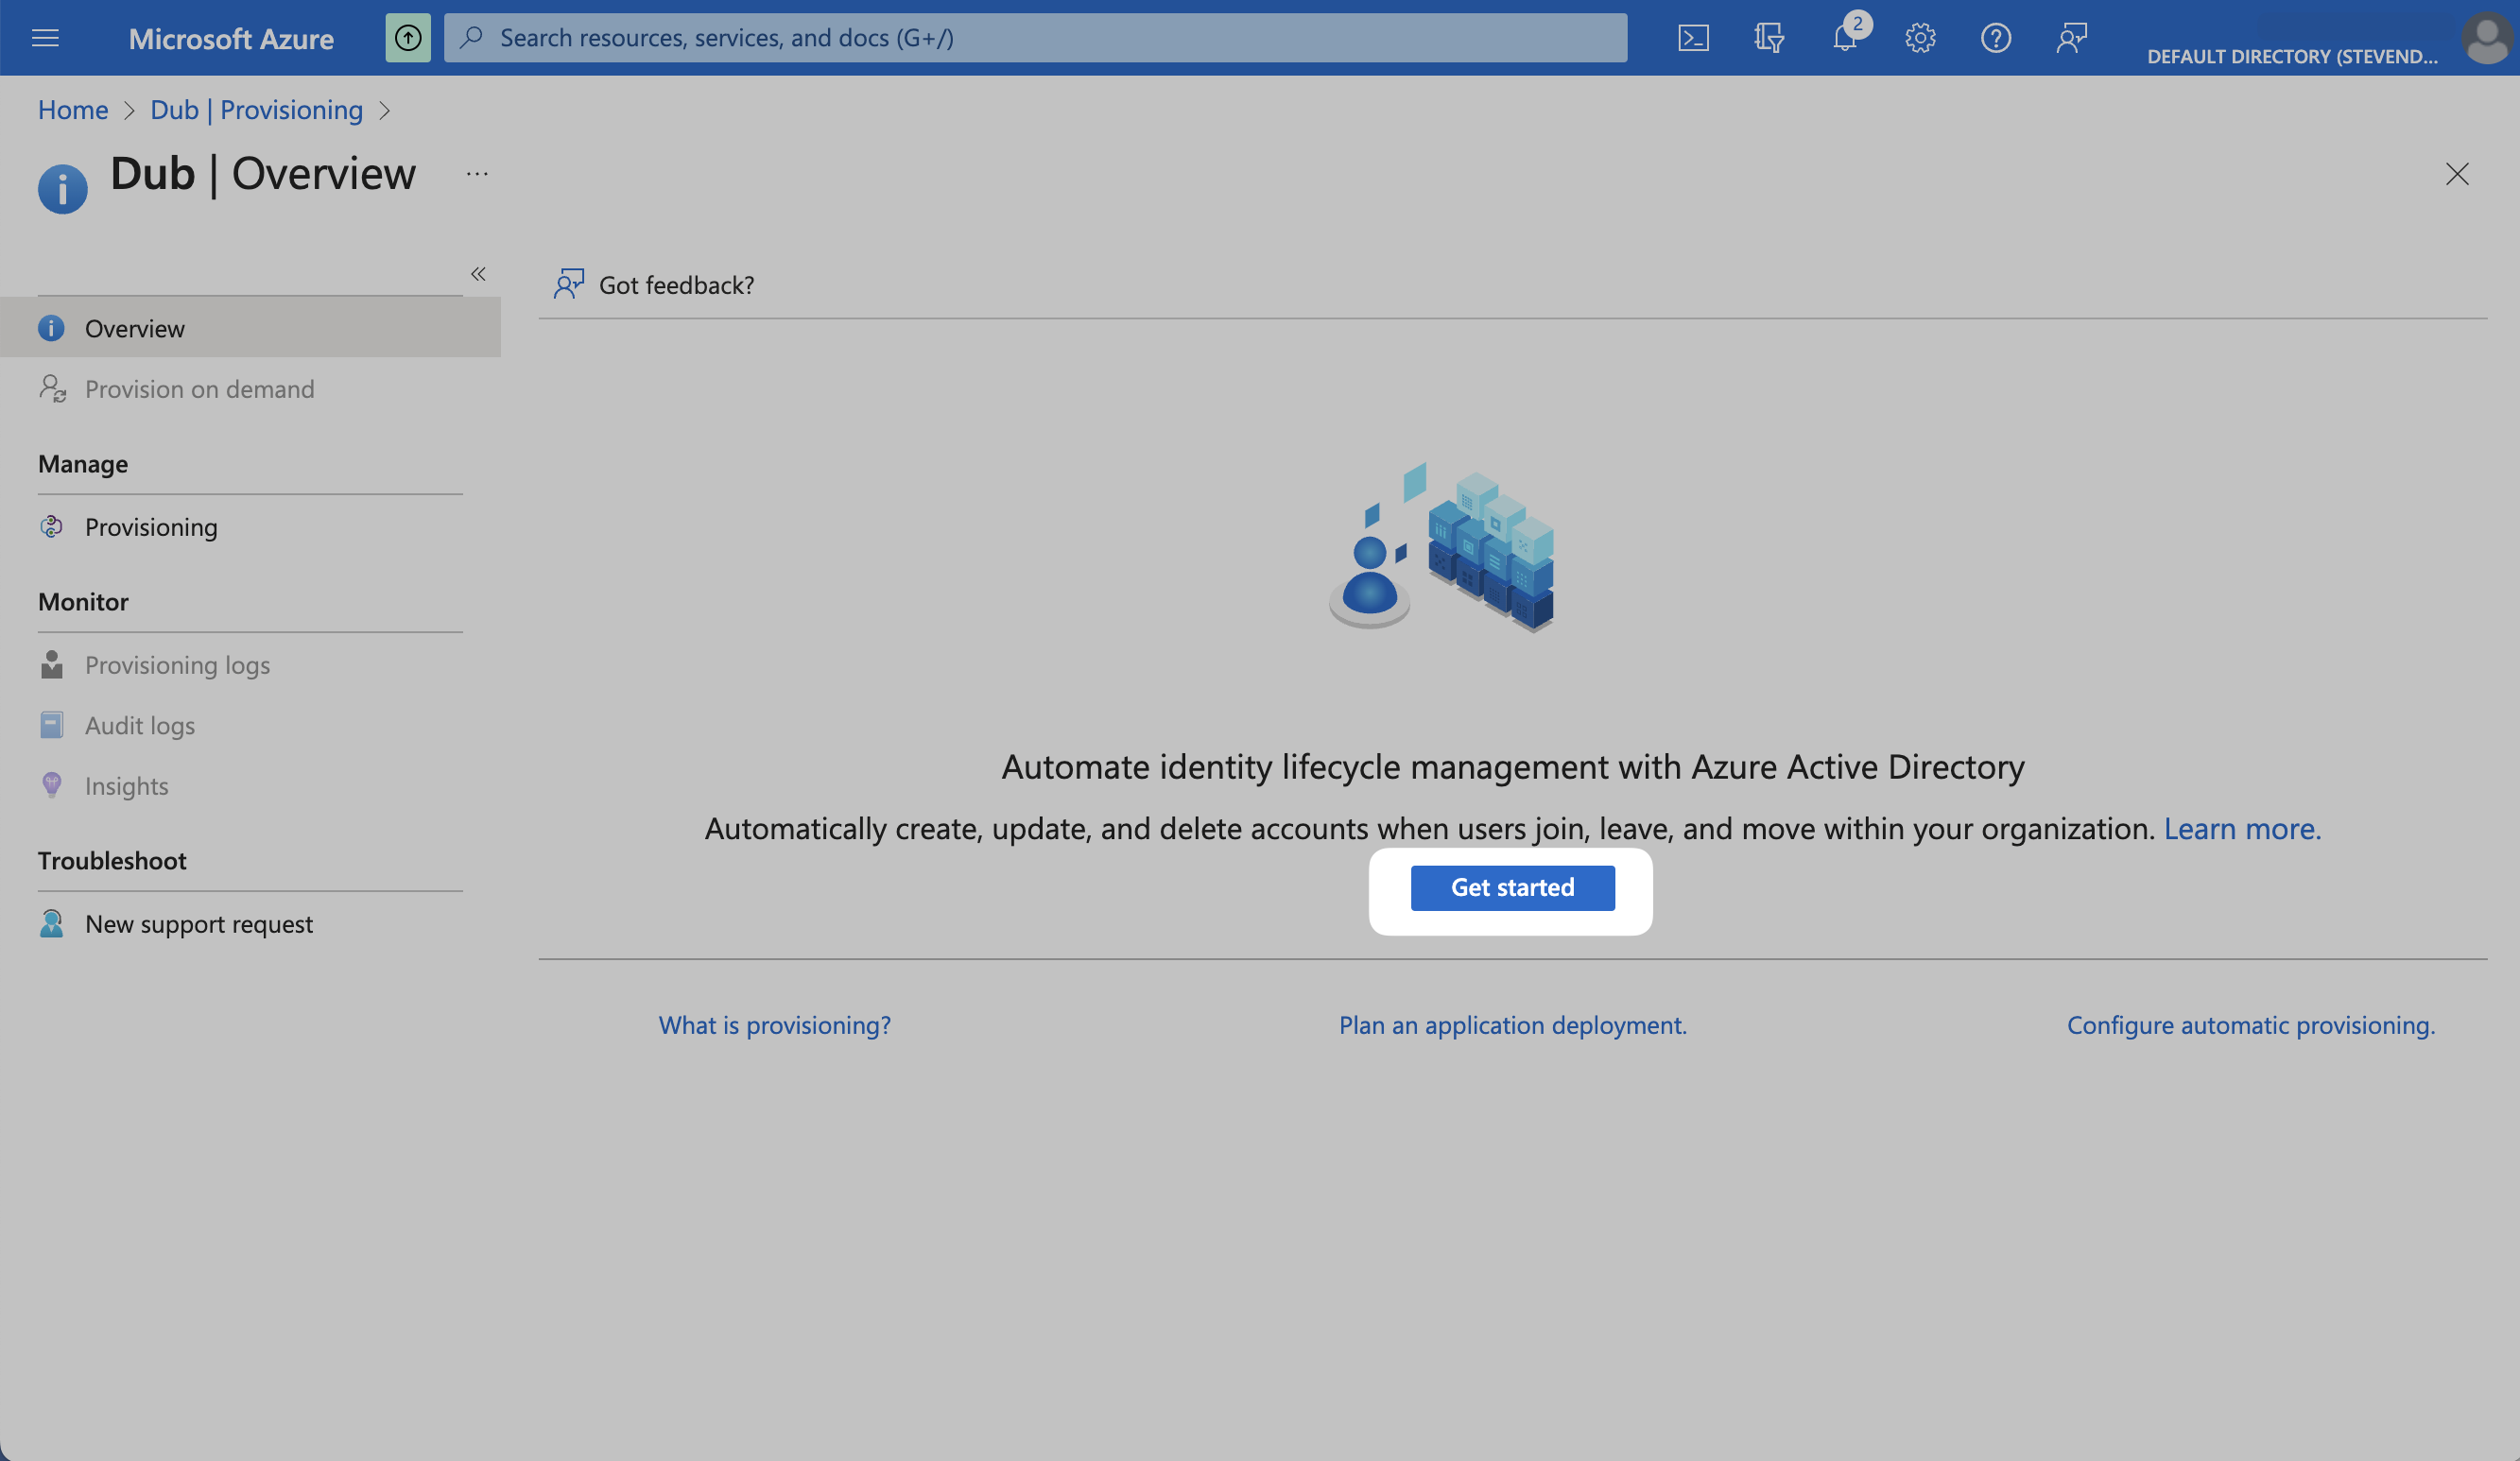
In the Provisioning tab, click on Get started.
Select Automatic from the Provisioning Mode dropdown. Under the Admin Credentials section, enter the values that you obtained from Step 1:
- Tenant URL
- Secret Token
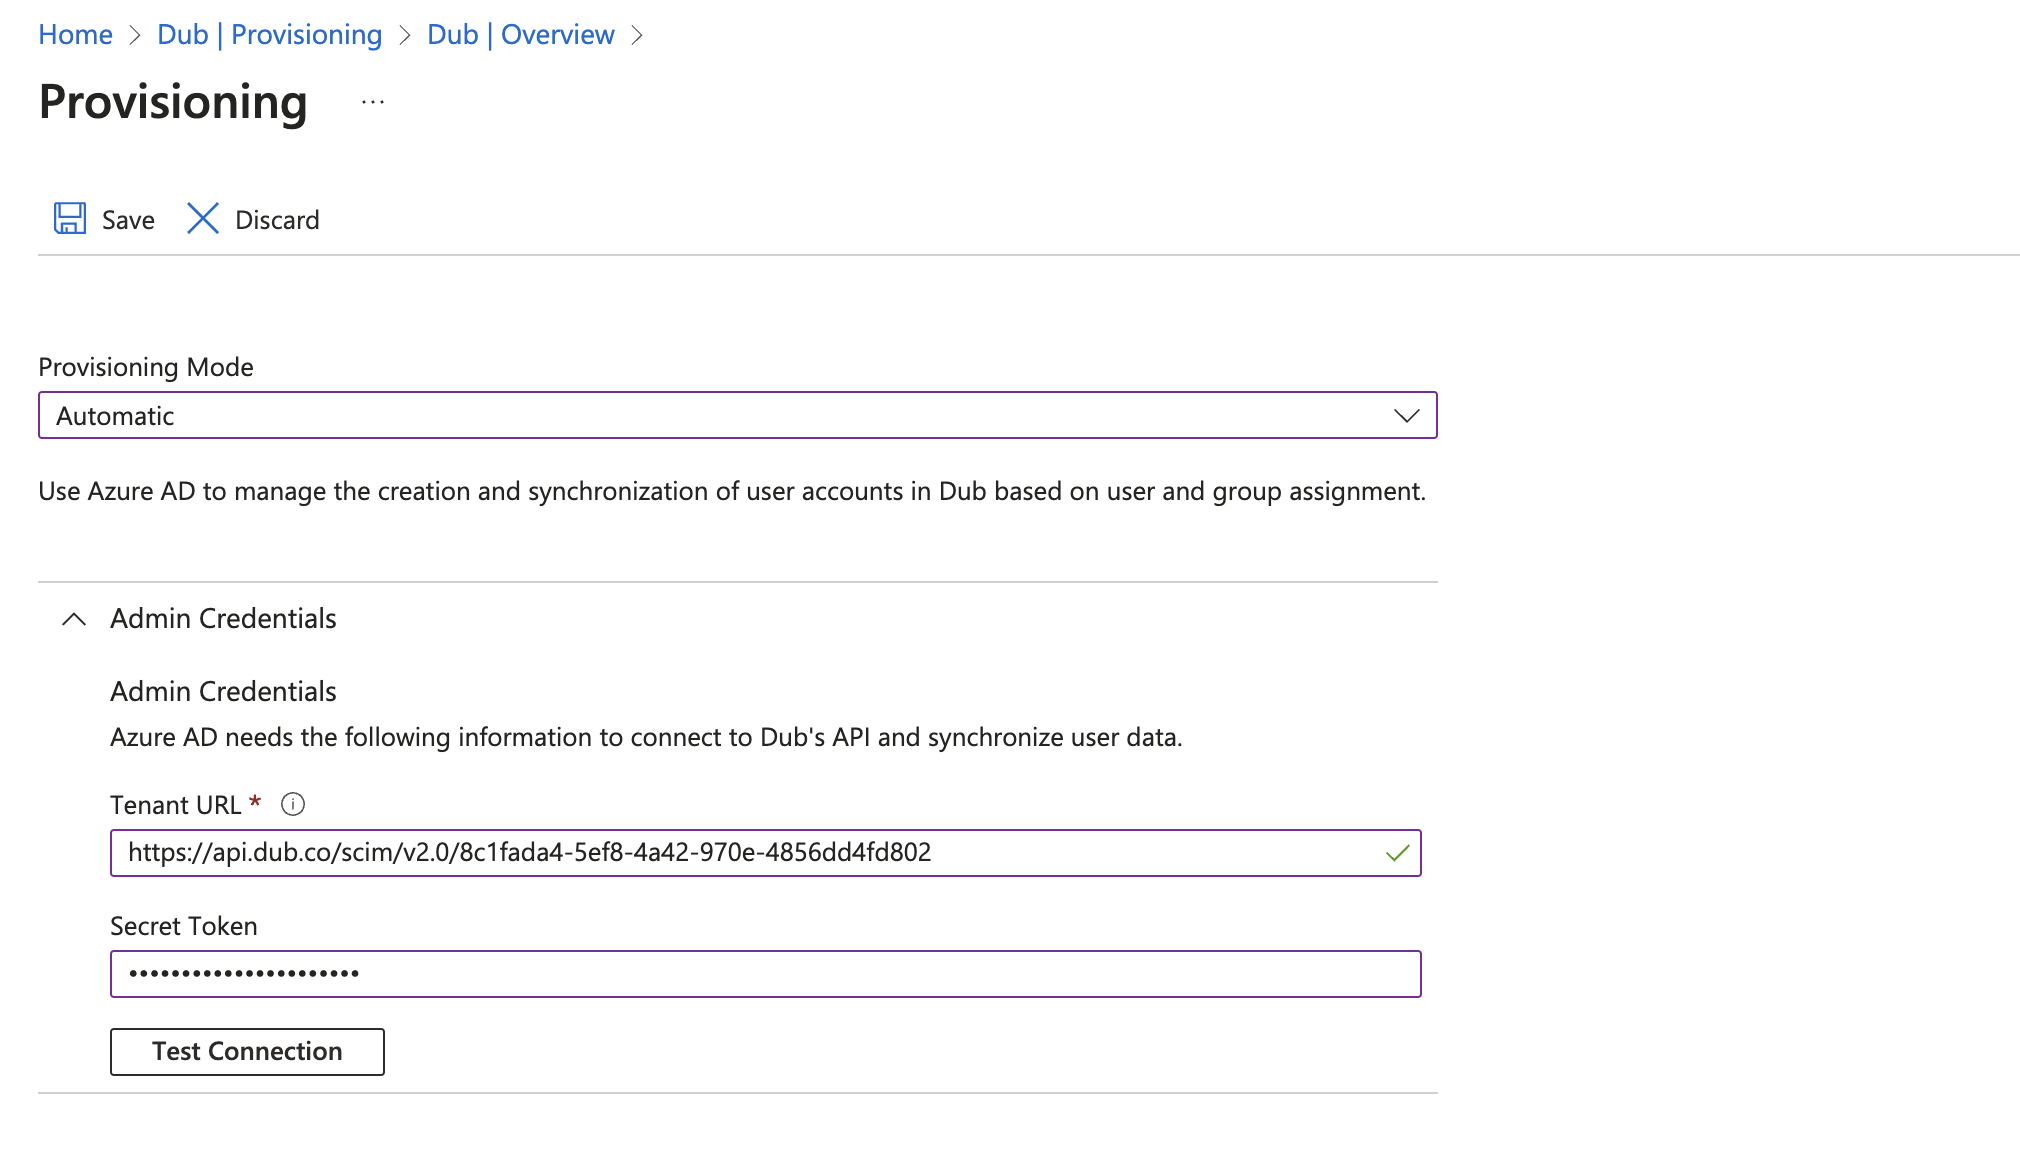
Click on Test Connection to test the connection to see if the credentials are correct, then click Save to save the credentials.
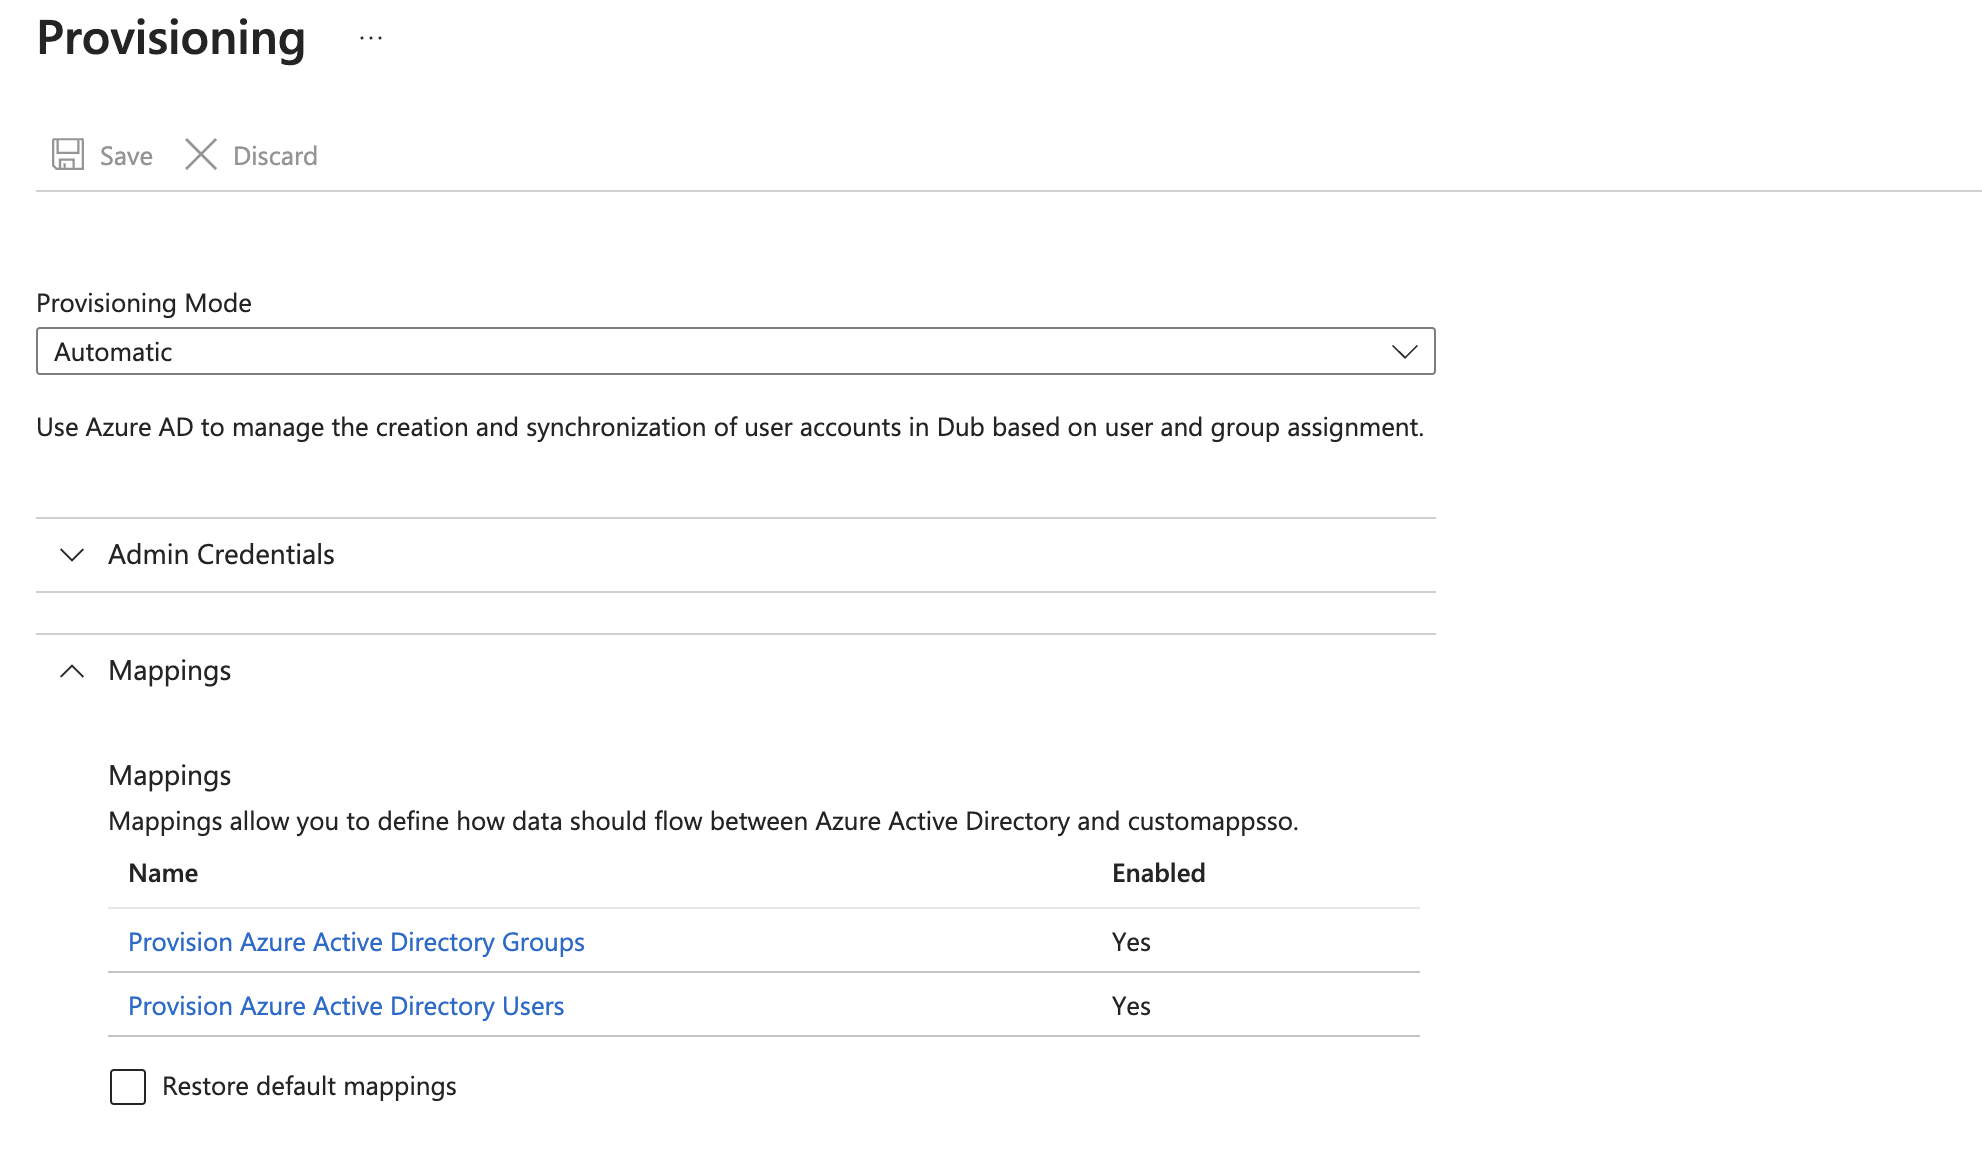
Expand the Mappings section and ensure group and user attribute mappings are enabled for your app. The default mapping should work.
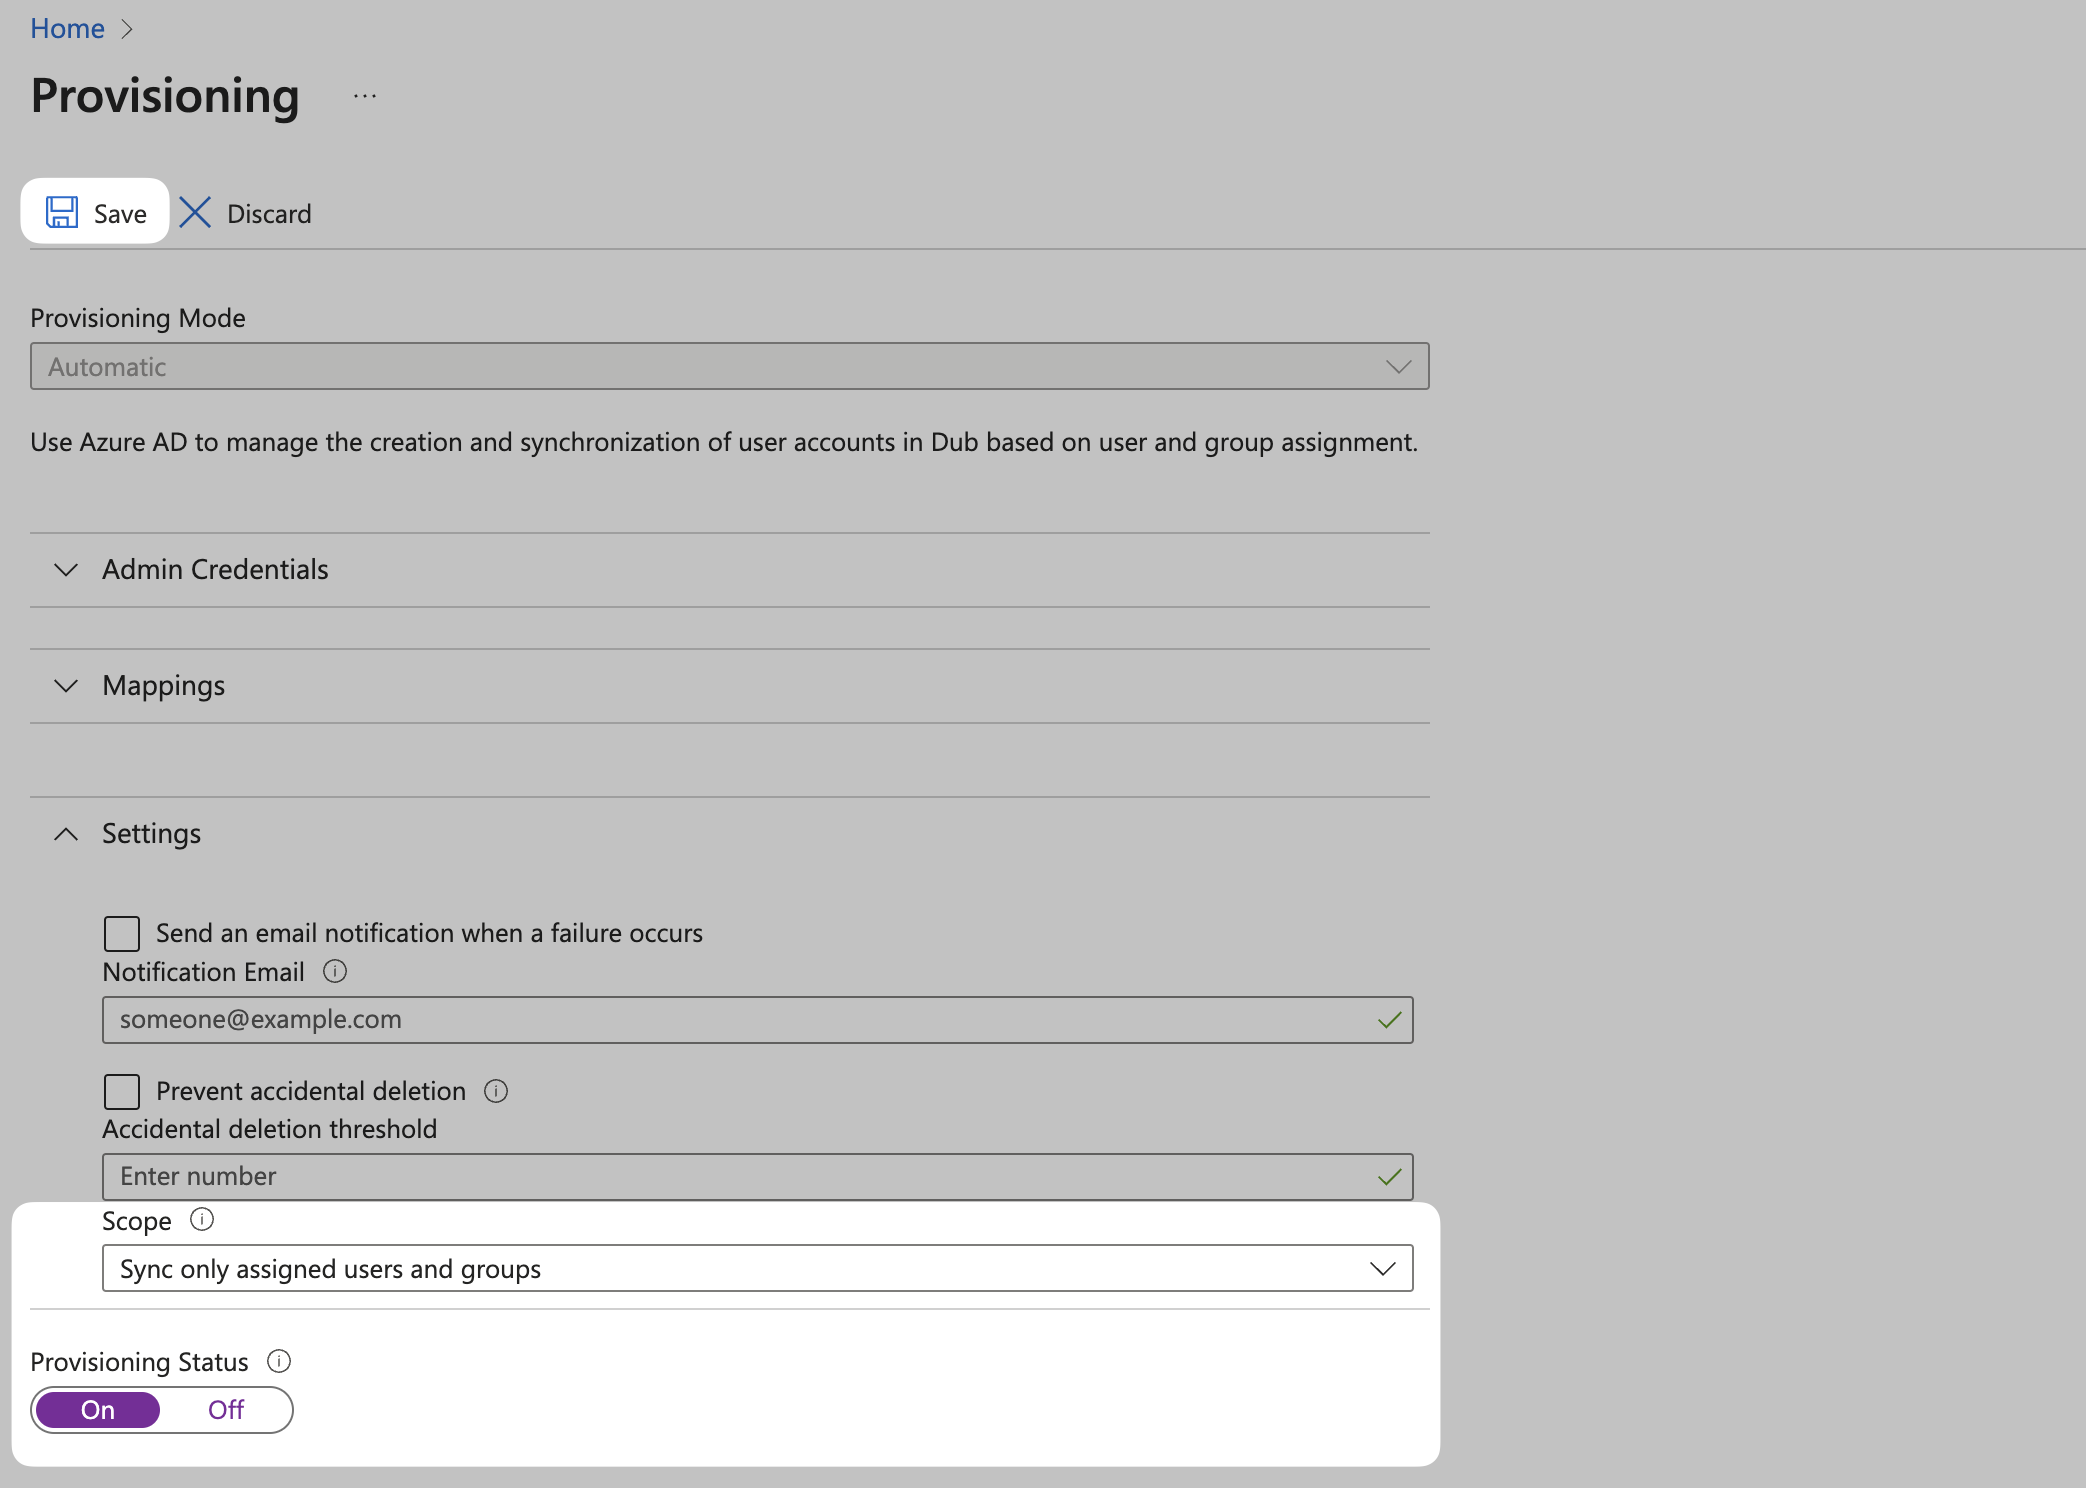
Expand the Settings section and make the following changes:
- Select Sync only assigned users and groups from the Scope dropdown.
- Confirm the Provisioning Status is set to On.
Click Save to save the changes.
Congratulations! You've successfully configured SCIM provisioning for your Dub workspace.
Step 3: Assign Users
Once you've configured Directory sync, you can assign users to Dub directly within Azure AD.
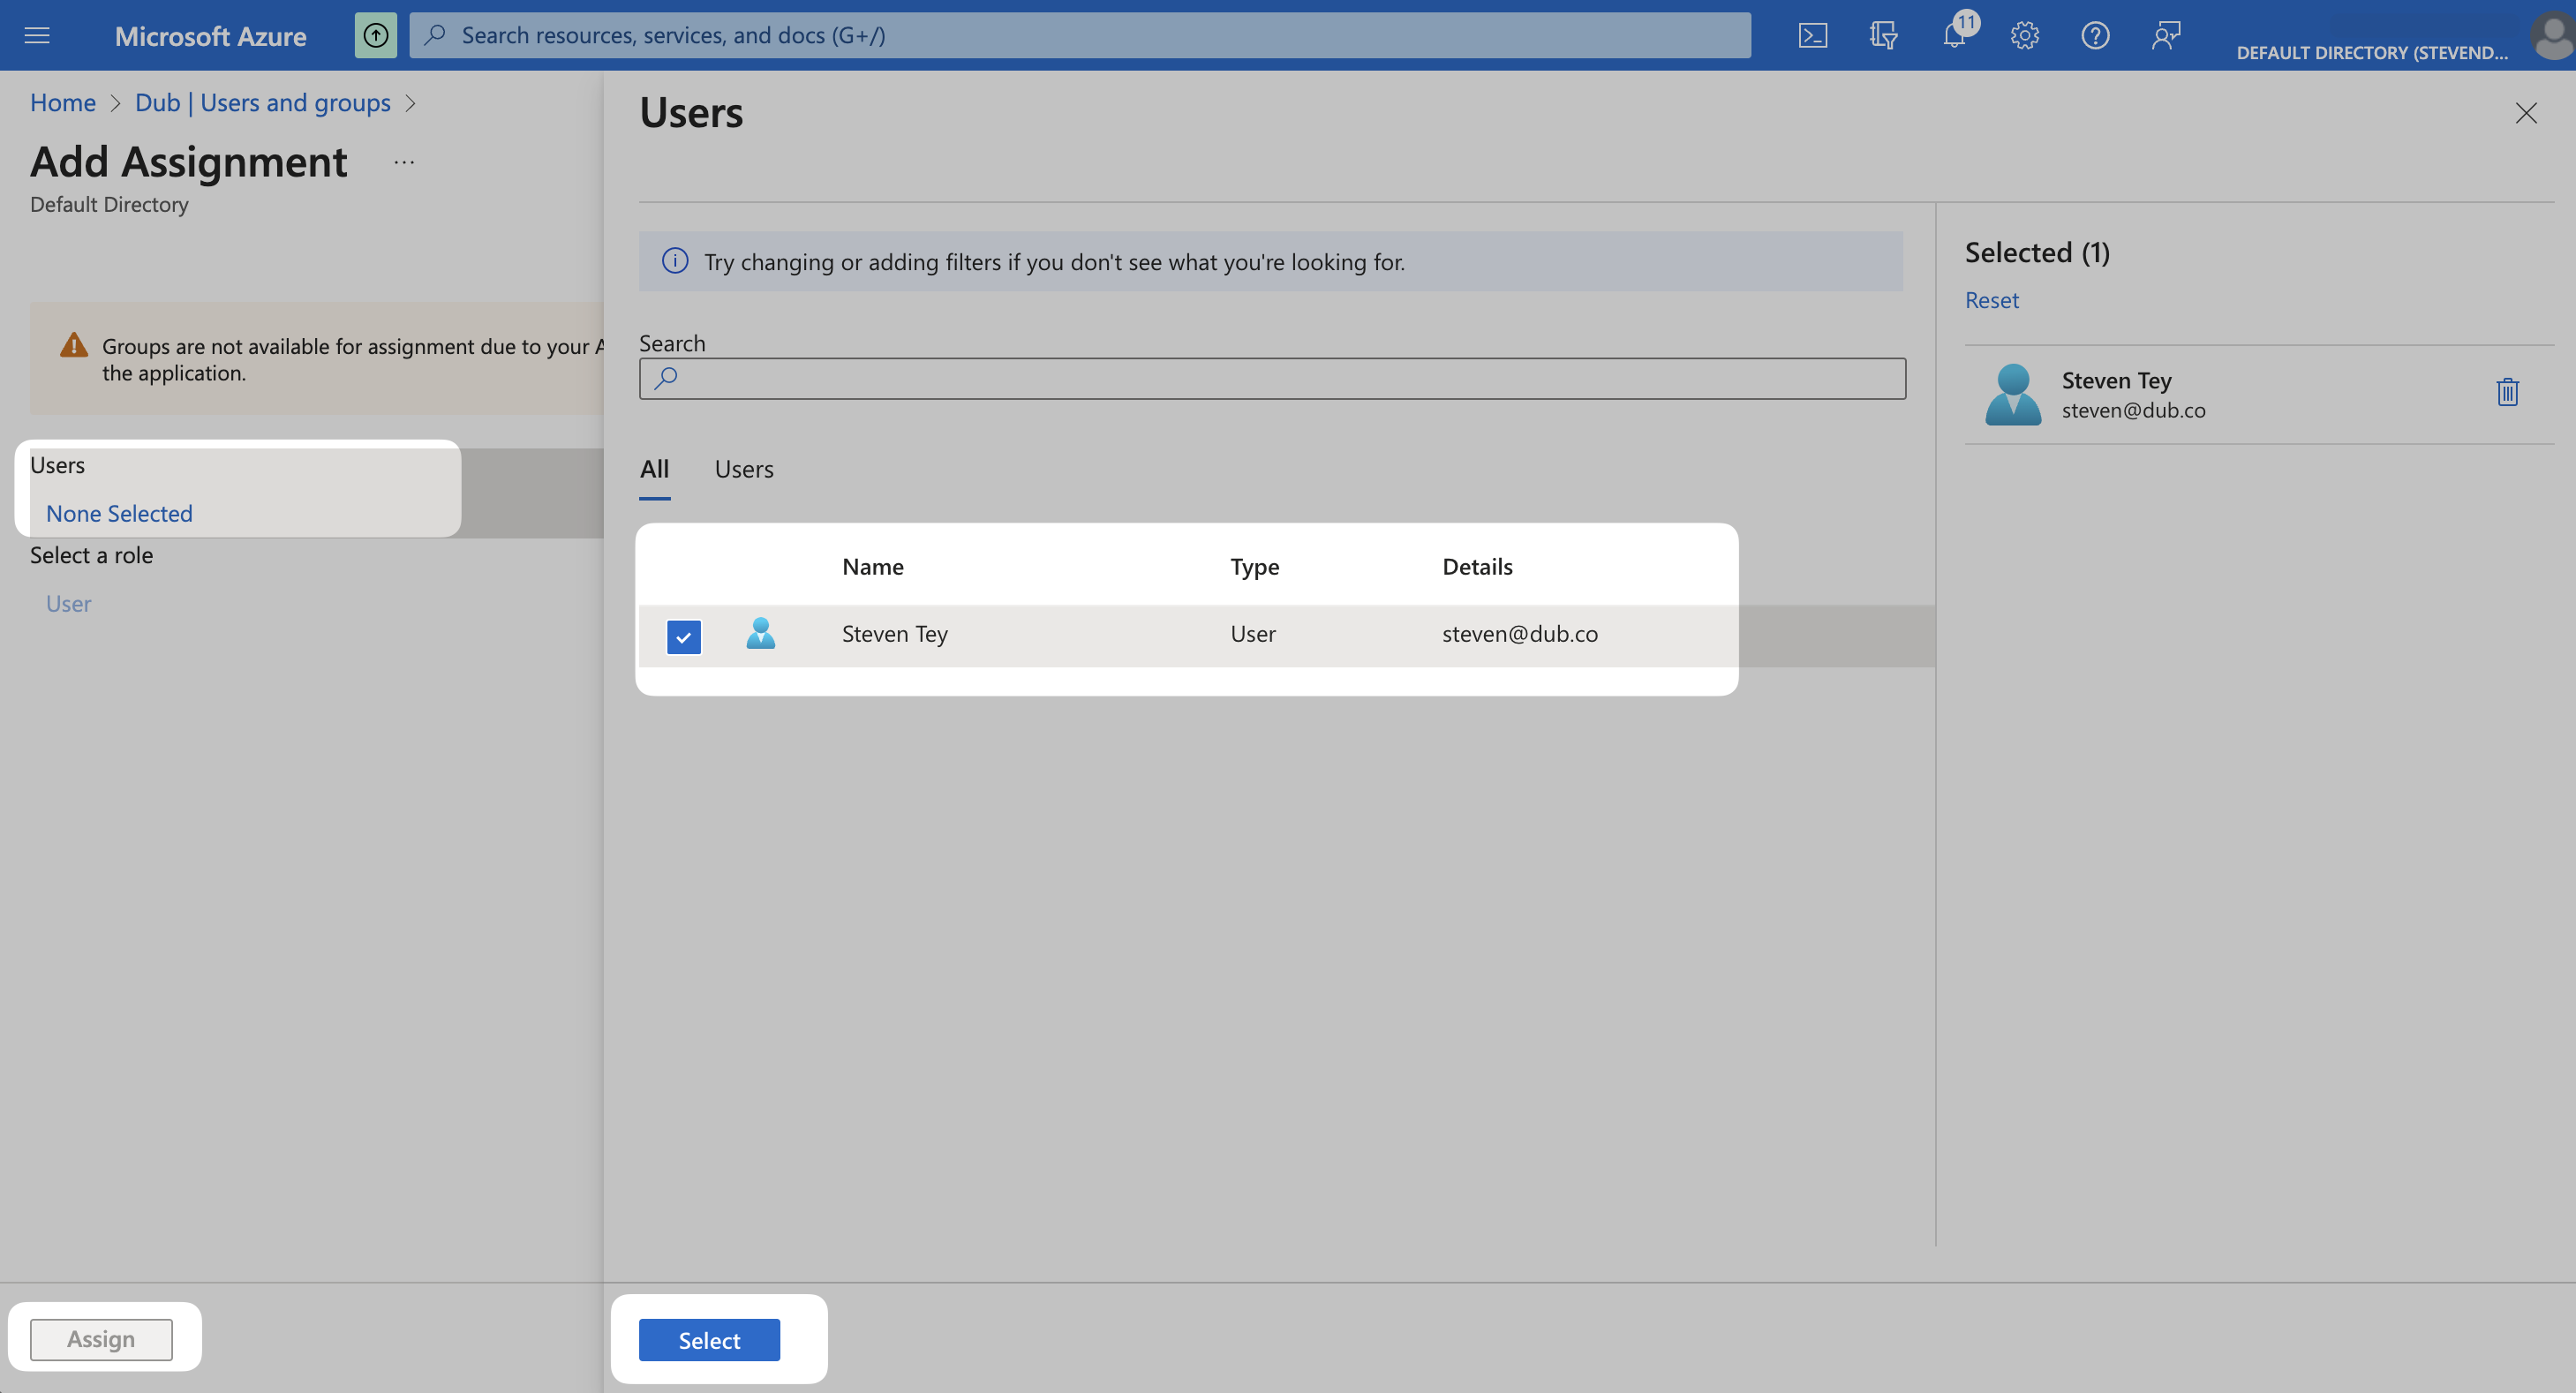
From your application, click the Users and groups from the left navigation menu and click Add user/group.
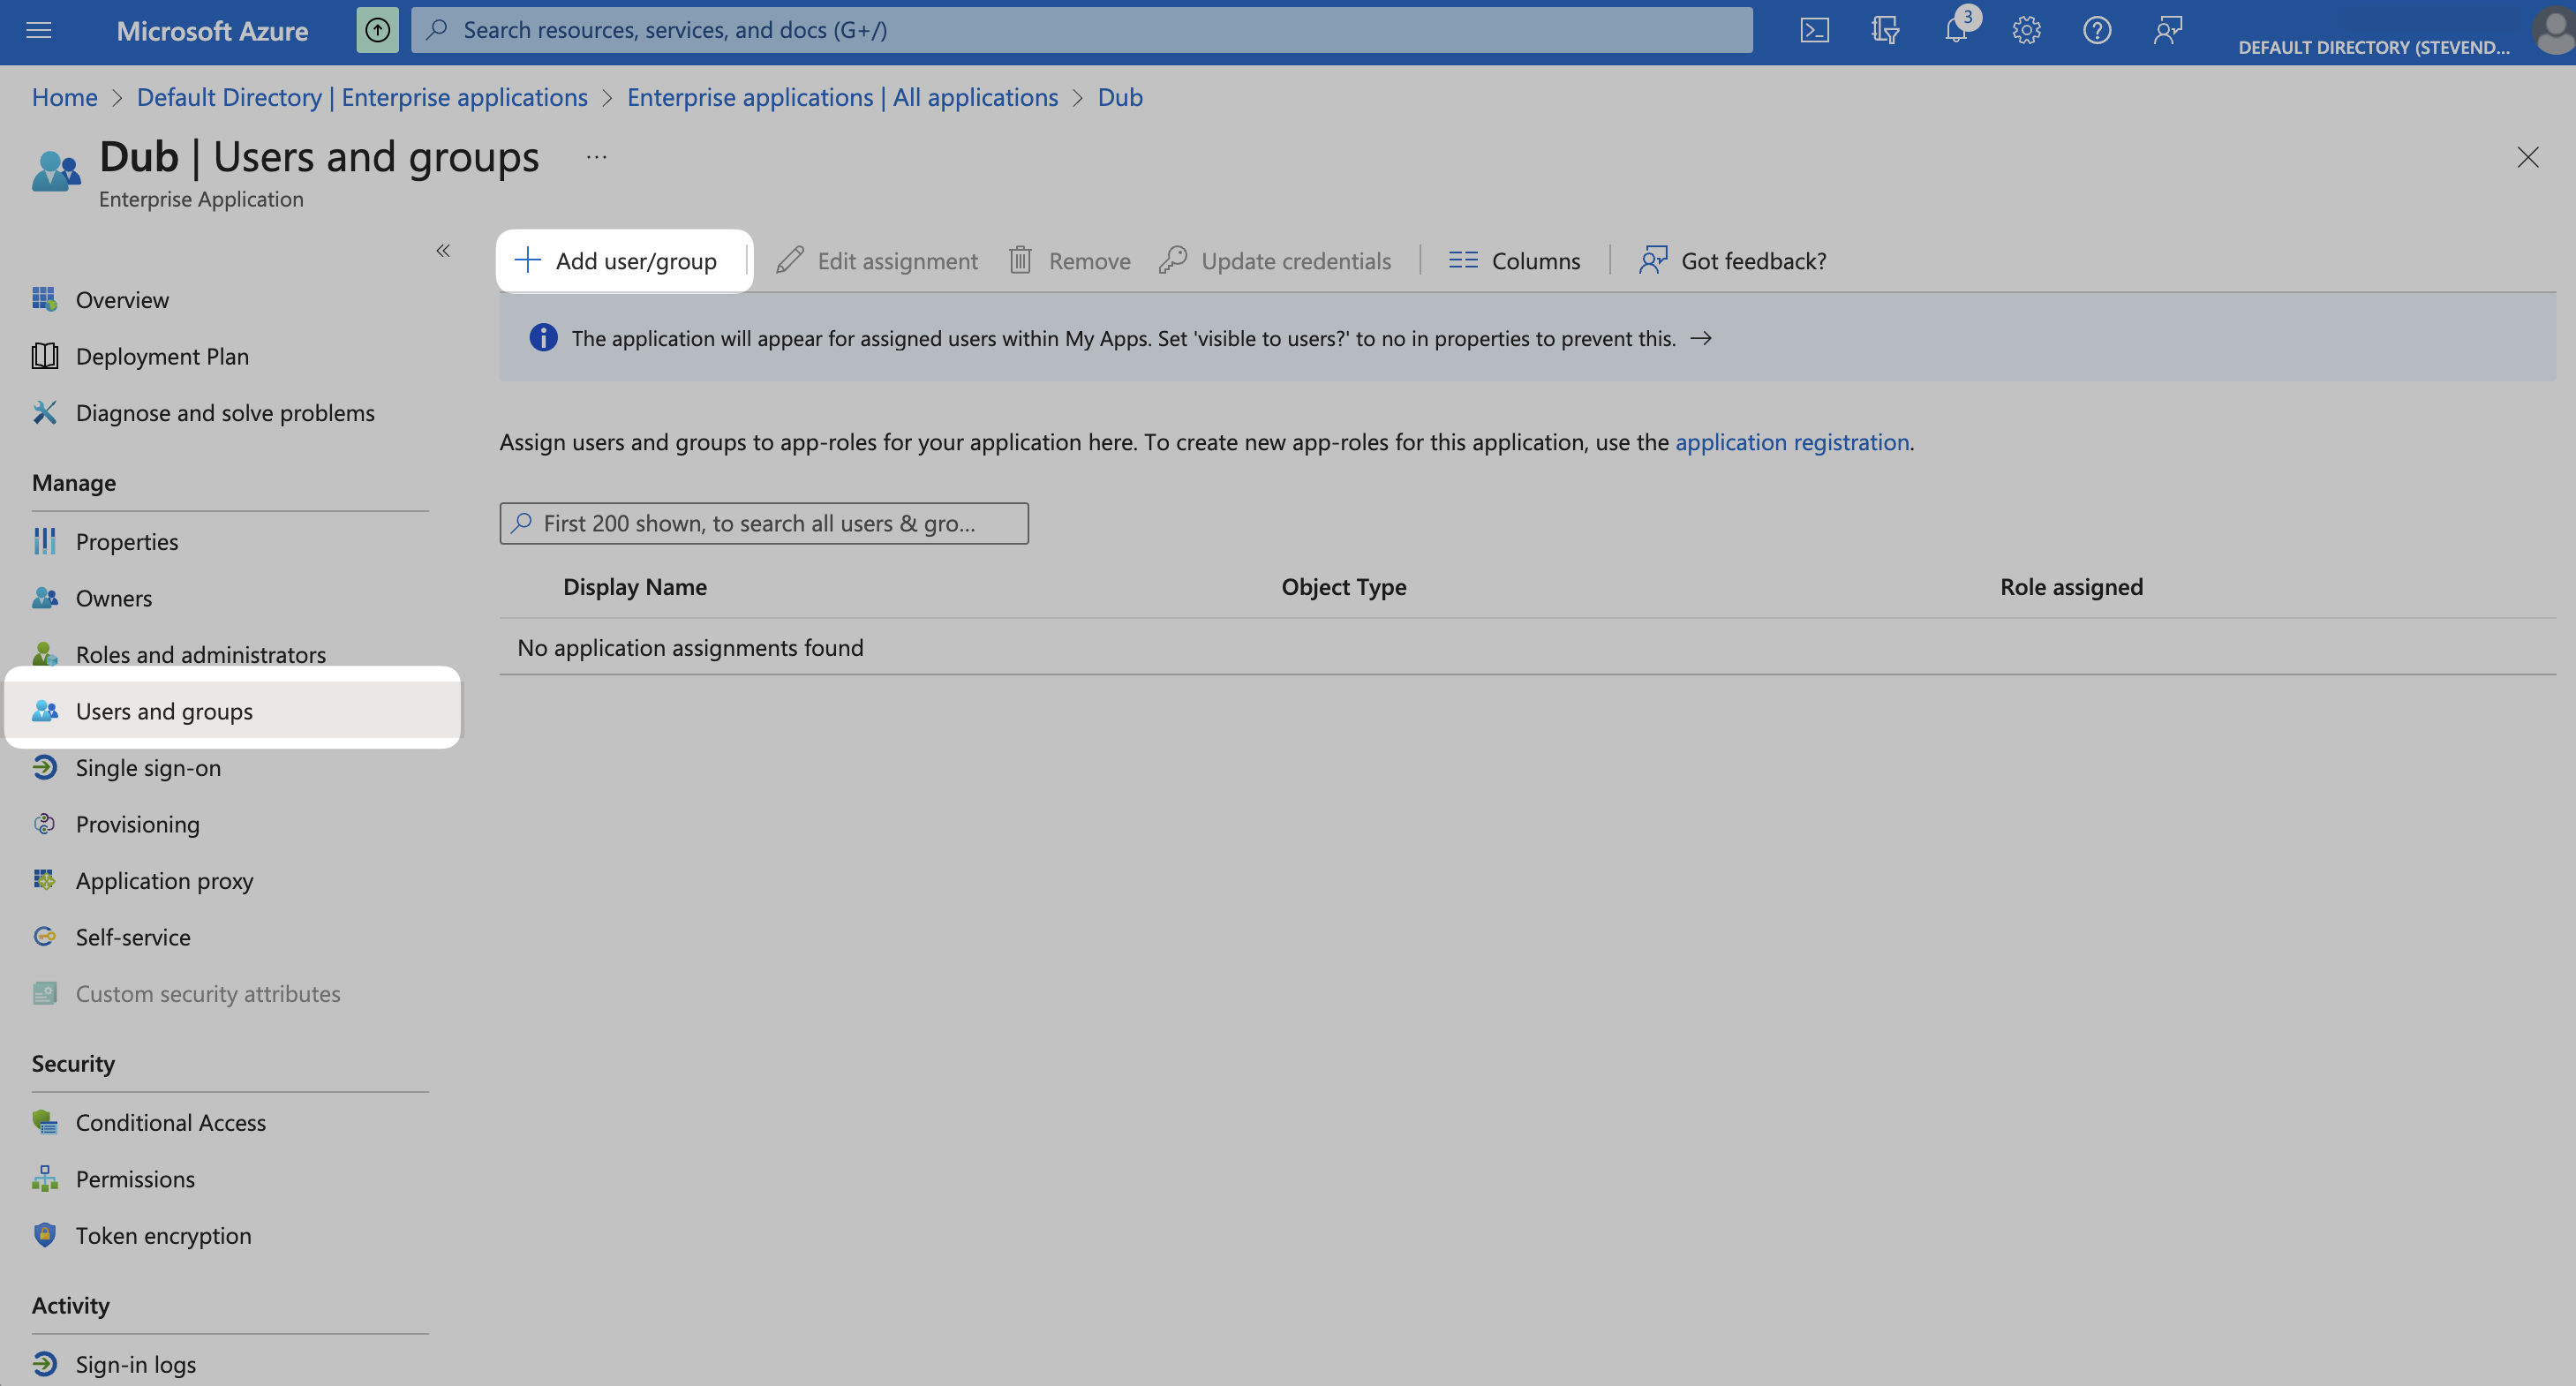
Click on None Selected under Users.
From the right side of the screen, select the users you want to assign to the app and click the Select button. Thenm click Assign to those users to your app.
Your assigned users should now receive an invitation email to join your Dub workspace.
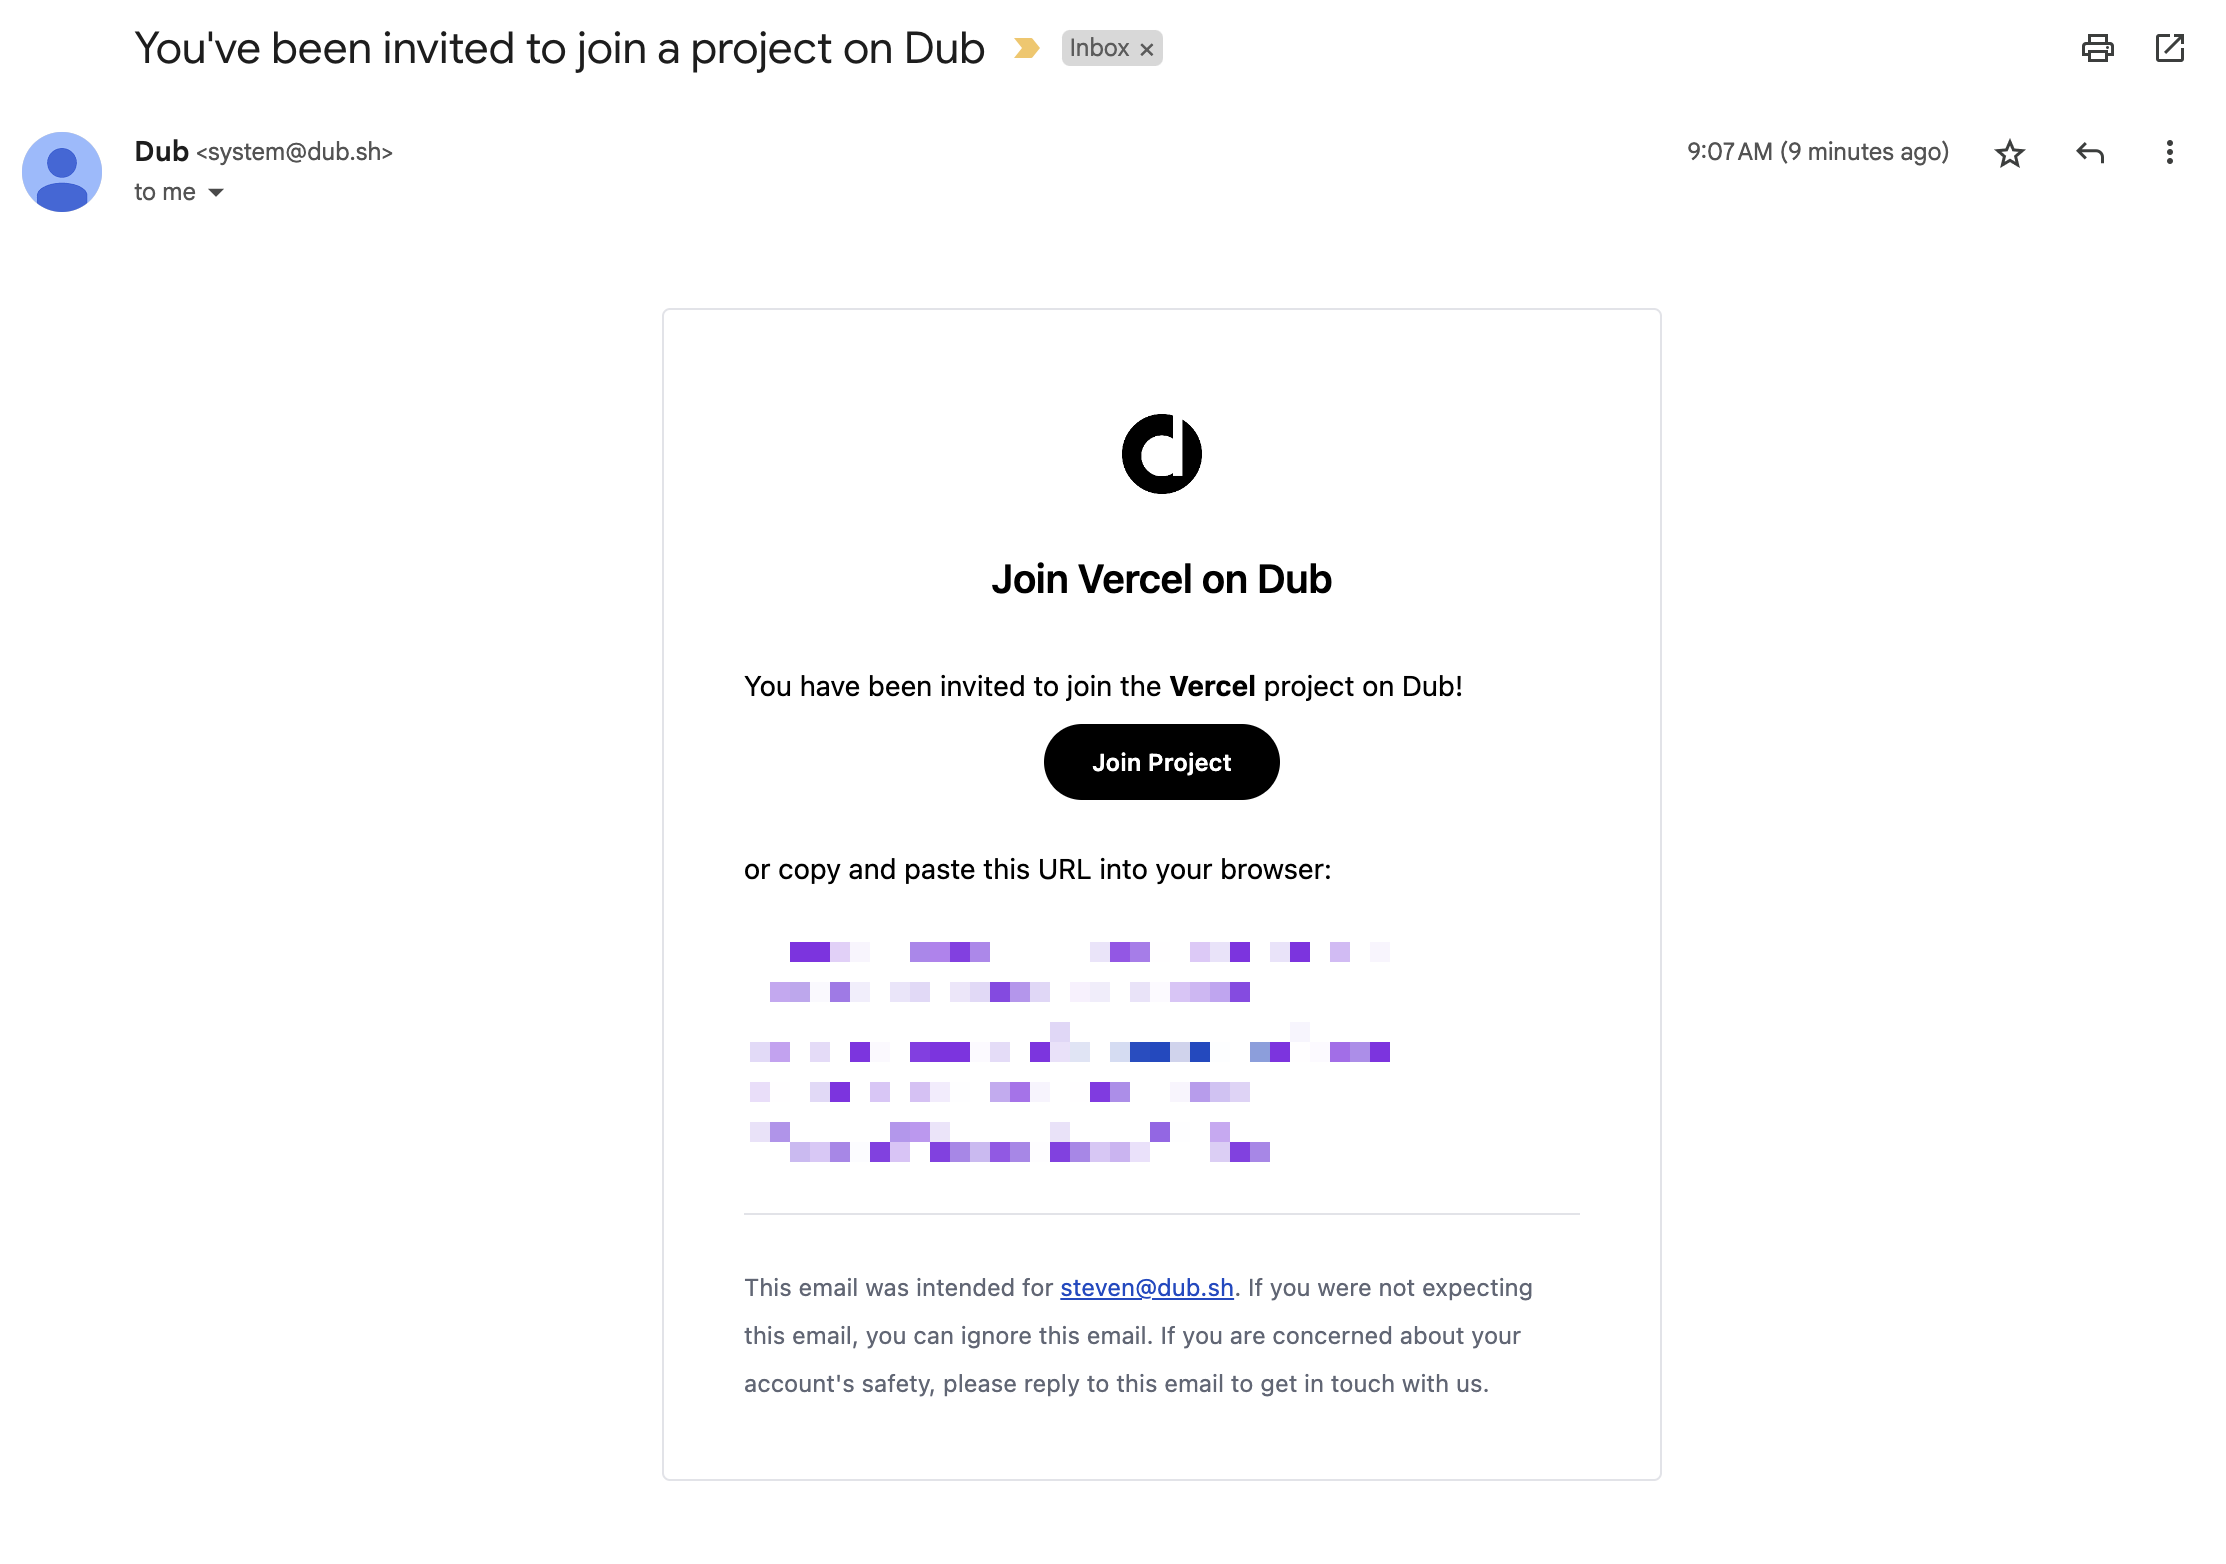
Azure AD SCIM provisioning can take anywhere between 20-40 minutes to sync. This means that it may take up to 40 minutes for your users to receive the invitation email and be able to join your Dub workspace.
They will also be able to sign in to Dub using Azure AD SSO.